
Beginners Installation of Selenium->TestNG ->Cucumber for Win and Mac OS _ Part- 2


As you have checked in my previous blog how to install java and Maven on windows as well as Mac OS. you can go ahead installing TestNG and Cucumber on your systems.

To give a little overview..
TestNG

TestNg is an open source automation testing framework in which NG stands for "Next Generation"
TestNG is inspired from JUnit and NUnit introducing some new functionality that makes it more powerful and easier to use.

To install TestNG to Eclipse

1-open eclipse  go to help->Eclipse marketplace-> search for TestNG-> and install
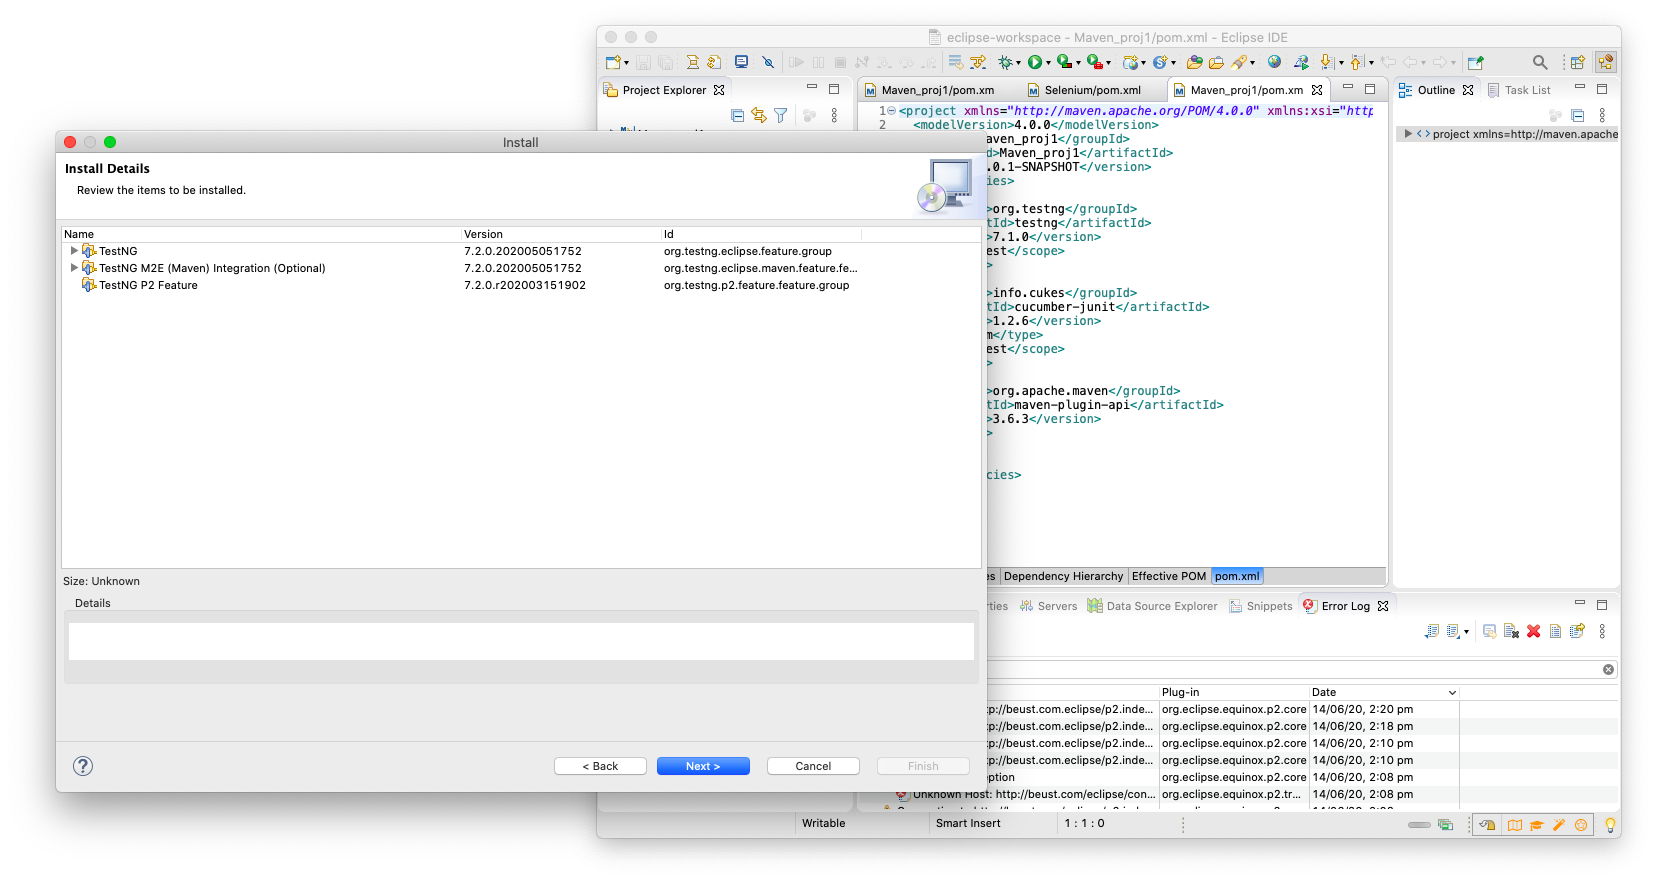
confirm the installation of TestNG


Click on finish to complete the download


If cucumber plugin is not available under eclipse marketplace  then user other method
2- Open eclipse go to help->Install new software->click on "Add" button enter Name- "TestNG"
Location  "http://beust.com/eclipse" Can be used for eclipse 06-18 


For eclipse 09-18 use the link in location "https://dl.bintray.com/testng-team/testng-eclipse-release/6.14.3/" enter Name- "TestNG" click OK. 

now it will be available under new software 
select and click on next agree the license  and complete


Well done you are done installing TestNG to your windows/Mac system  successfully 👌

Cucumber

Cucumber is a testing tool that supports Behaviour Driven Development framework 
It defines application behaviour using simple English text, defined by a language called Gherkin

To install Cucumber to Eclipse

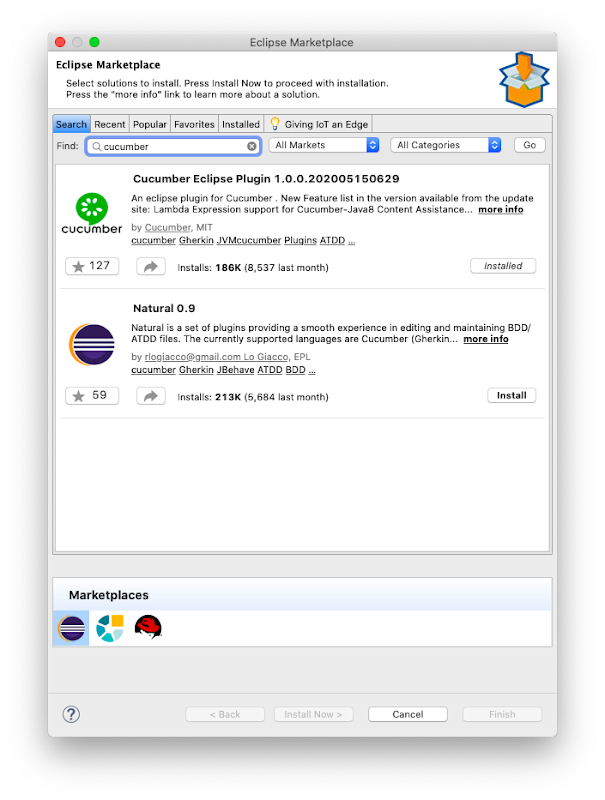
1- Go to help->Eclipse marketplace-> search for cucumber-> found "cucumber eclipse plugin" and install

If cucumber plugin is not available under eclipse marketplace  then use other method.

2- Launch Eclipse click on help menu and launch eclipse->click on install new software->. In the dialogue window click on Add button type enter the name "Cucumber" and location 
"http://cucumber.github.com/cucumber-eclipse/update-site" click OK


It will take some time to process and cucumber plugin will be visible

                 select the cucumber eclipse plugin and click on Next
.      

Select to accept license and agreement and Finish

Bravo you are done installing cucumber to your system successfully💪
In order to execute test cases using cucumber watch out for my next blog.

Comments

Popular posts from this blog

Cucumber - Execution of test cases and reporting

Before going through this blog please checkout blog on   Cucumber Fundamentals Cucumber is testing tool which implements BDD(behaviour driven development).It offers a way to write tests that  anybody can understand, regardless of there technical knowledge. It users Gherkin (business readable language) which helps to  describe behaviour without going into details of implementation It's helpful for  business stakeholders who can't easily read code ( Why cucumber tool,  is  called  cucumber , I have no idea if you ask me I could have named it "Potato"(goes well with everything and easy to understand 😂) Well, According to its founder..... My wife suggested I call it  Cucumber  (for no particular reason), so that's how it got its  name . I also decided to give the Given-When-Then syntax a  name , to separate it from the  tool . That's why it's  called  Gherkin ( small variety of a cucumber that's been pickled. I...

Automating Flipkart via selenium

                                            Hi Folks, we are automating a flipkart site where you will see how to search and filter the product you choose without logging in . import java.util.concurrent.TimeUnit; import org.openqa.selenium.By; import org.openqa.selenium.WebDriver; import org.openqa.selenium.chrome.ChromeDriver; import org.openqa.selenium.support.ui.Select; import org.testng.annotations.Test; public class flipkart { WebDriver driver ; @Test       public void test()       {   System.setProperty( "Webdriver.chrome.driver" , "chromedriver" );     WebDriver driver = new ChromeDriver();   driver .manage().timeouts().implicitlyWait(5, TimeUnit. SECONDS );   driver .manage().window().maximize();          driver .get( "https://www.flipkart.com" );   ...

Jmeter 5.4.1- Config Elements - Part-03

  Part-01- Installation of Jmeter and HTTP's Recorder click  here Part 02--Previous blog on Assertion Config elements in Jmeter are used to configure or modify the samplers requests made to the server. These elements are added at the same or higher level of the samplers that we want to configure  Let' start with  CSV data config As the name suggest it used to read data from CSV first we need to put data in variables and then use the variables in sampler request. create a new test plan add CSV data set config Add a Thread Group and then add Sampler "Java Request"  Create a CSV file  with some data (Name and Data) and save it  Now go to Jmeter CSs data set config browse and upload the css file create Make few more changes in place of  variable name - Name and Dept Ignore first line - True Delimeter - \t (as suggested) Now move on the Sampler-" Java Request" and rename it with header elements of CSV As we have Name and d...